
After realizing what NOT to do for a peg doll swap...

...sniffing all too many sharpies while making ornaments for a Jesse Tree swap...

...and modge podging like mad for a 12 Days of Christmas ornament swap...

..I decided I would teach myself how to wood-burn for an upcoming Lenten Resurrection egg swap.
(Note: Some of the links below are affiliate ones. Should you click through these to make any purchase we may receive compensation at no extra cost to you as per our Full Disclosure.)
How I Made Our Lenten Resurrection Swap Eggs
First, I broke our our brand-new woodburning kit, which we got at a discount around Christmastime in preparation for this project, and the bag of wooden eggs, which a friend purchased in bulk and divided with swap members. I searched for the smoothest of the eggs since I wanted to dive in for the first time without having to sand.

Then, while the woodburning tool was heating up, I began searching for and sketching images of my assigned image: nails. An easy image, I know, but I wanted to land on a design that had a bit more oomph than a single nail or two. So, the kids and I set to brainstorming.

Once I settled on an image, I drew it on a paper, turned the paper over, and colored the backside with pencil. I did this on scrap paper so the pencil markings from the drawn nail side would not transfer onto my table.

I then flipped the paper over on the image, and traced it. Thereby transferring the image of the nails I had settled on -- old style nails in the shape of a cross -- into the egg.

Image drawn, it was time to woodburn.
My first go went well, but I did end up learning something that I passed on in our swap group page:
When aging with long hair, pull your hair back before wood burning. As my developing need for bifocals got the best of me, I leaned close to my woodburning tool and egg. A bit of hair told me how close I was when it gave a singe scream (a quiet one) and sent off a putrid smell to break the silence of my woodburning concentration. Pony tail holder now in place! LOL

After burning just two eggs, my kids joined in the craftivity at our kitchen table by beginning to paint peg dolls for a kids' swap. So, that was the end of my woodburning. I simply could not concentrate on my project while helping them with theirs.
The next day, Nina, grateful for my help the day before, offered to help me sand the rougher wooden eggs in my bag.

We sanded and sanded, using multiple grades of sandpaper, but many of the eggs just would not completely smooth. So, after consulting with several swap members, including the swap coordinator, I gave up on the sanding and added this tip to my future swap brain file:
Accept rough surfaces or buy Grade A eggs. The "seconds" we bought just did not want to get smooth!

At that point, it was time to transfer the image onto the 11 eggs I had yet to do. (All of us in the swap are doing 13 eggs so we can each keep one full set while donating a full set to a local mom!)

Then, it was back to my woodburning, with my hair tied back to avert further singing and my neck craned forward to make up for my aging vision. (Learning humility and acceptance is a BIG part of these swaps for me.)

Since my daughter wanted to help with this part, I let her play photographer, and, then, after she had been watching me carefully for some time, I allowed her to use a hand-over-hand method to burn some of the eggs with me.
And, yes, before I let her delicate hands get so close to the ultra-hot tool, I said a prayer to both of our guardian angels. For, while she had proved her patience and I was confident that she could burn the wooden eggs with me, I was nervous while guiding her little hand.
After letting her do a few eggs with me, I suggested she go back to being our photographer.

Between my daughter's efforts and mine, this is what our eggs looked like once they were all burned.

So, it was time for painting.
The acrylic paint color I chose to paint the eggs looked like it was going to be a muted, almost pastel, "blood" color. However, once I got it on the egg tops, I realized it was much darker. I decided to go with the color even if it was dark since it seemed fitting for the nail image.

So, I after the tops dried enough, I did the fronts of the eggs, the back, and the bottoms, all leaving drying time in between.
The hardest part was the oval around the burned nail image. I started these ovals quite wide around the images because I do not have the steadiest hands, and, then, each time the line of an oval looked too uneven, I simply closed the oval in a bit. I found by tipping a paint brush on its side, holding it close to an egg, and rotating the egg around slowly, as opposed to moving my paint brush hand, I had the most luck.

Finally, all the eggs were done. They were not perfect, but they were as good as I could get them and I was afraid if I kept trying to improve them, they would end up worse, not better.

I let the eggs dry for a day, did a few minor touch ups, let them dry again, and then set to sealing them.
I had used layers of Modge Podge to seal things in prior swaps, but had since been told that it was not the best sealer. So, upon a recommendation, I purchased Triple Thick glaze spray for this project, thinking it would be quick and easy to apply, with beautiful long-lasting results.
Such was not the case... First off, I thought our home was well-ventilated enough when I went to spray the eggs, but it was not. I almost asphyxiated us all, I think. Second, as soon as I sprayed, paint began to run off my eggs. Disaster!

Seeing my hard work at painting ovals arund woodburnt images dissolve, I tried to pick one egg up to wipe the running paint off with a rag, only to realize the was super sticky. So, I did a quick wipe, used soap, water, and alcohol on my hands to wash the stickiness off, and, then, grabbed a plastic bag to use as a glove.
With speed, I "saved" as many eggs as I could and, then, transferred them all onto new bags to dry, so I could throw out the other smelly, sticky, paint-glaze pooled bags in the outdoor trash.

Since I did not want anyone to face the same near-demise my eggs did, I immediately posted in our local swap group about what happened and also asked about others' experiences in a national swap group. I learned that many use Triple Thick, but few ever use spray, while others prefer Minwax. I also learned that our local swap leader, indeed, uses Triple Thick spray for projects, and has for years, without any incident.So, after another 24 hours or more of letting the eggs dry, I bravely took the eggs outside on a tray and gave them a second coat to cover over anywhere my first effort at sealing may have failed due to my handling the eggs to wipe off running paint before the eggs had dried.
This time, the spraying went much better. No big runs happened and, after leaving the eggs on the stoop for several hours, I was able to take them in, let them dry over night, and transfer them to a carton.I was sad as I did so over the eggs that had been ruined. However, I cheered up when another swap member who'd stopped by to return my woodburning tool, which she had borrowed, took a look and said they were fine. She could not believe how smooth my ovals were. (Really?!?) And, she thought the eggs had homemade character. (Such a sweet and encouraging friend!)

So, now, my eggs sit ready to be swapped. I cannot wait to see what the other moms did and to get my whole set of wooden Lenten Resurrection Eggs.

Credit Where Credit Is Due
Sarah, from Frugal Fun for Boys, inspired our local swap coordinator to suggest this swap. Head on over to her DIY Resurrection Eggs post to checkout her wonderful work!
No Time for Crafting?

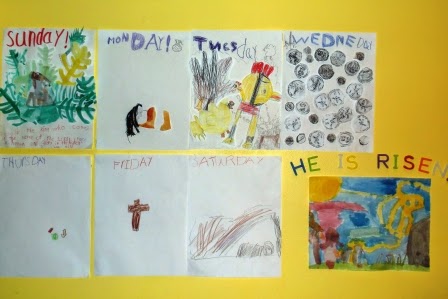
If you don't have time for wooden egg crafting, you can easily whip up some sensory smart Holy Week/Resurrection eggs like I have done in the past.

You can also purchase ready-made ones, like this set we found at a thrift shop a couple years ago and enjoy annually.
Or, dispense with the eggs altogether, and enjoy some hands-on Holy Week art instead.